Have you got a whole bunch of records that, though not necessarily beat up entirely, are still a little worse for wear? Wouldn’t it be great if you had a way to restore your records to their former glory? Heck, wouldn’t it also be good to learn about how to properly care for records so this didn’t happen in the first place?
Well, you’re in luck, for this is precisely the service that we are seeking to provide today!
Method 1: Wood Glue
If you have some wood glue lying around the house, then prepare yourself to use it on any scratched vinyl record you might have lying around.
Step 1: Applying
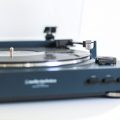
Firstly, you will want to apply the wood glue over the entire surface of the scratched record – for a more even spread, you can do so while your vinyl records are spinning on the turntable.
Place the tip of the wood glue at the outer edge of the record and squeeze the bottle very gently to ease an even amount of the wood glue onto the surface of the record. Continue with this until you have thin and even lines across the entire face of the record, much as you would with, say, a cleaning solution or a record cleaning machine like a Groovewasher or Spin-Clean.
Repeat the process for as much of your record collection as necessary.
Step 2: Spreading
Now that the wood glue has been applied, you can begin to spread it over the record into the record scratches. For this, you may use a piece of cardboard or any sort of card, taking a piece that is roughly 2 inches wide and allowing the record to continue spinning as you spread the glue across the record’s surface.
If you let your hand remain more or less stationary, then you are more likely to achieve an even spread of the glue on the record’s surface which will result in a greater sound quality. Just hold your hand there as the entire record spins and only very lightly urge the card in as the record spins inward.
If this is a particularly deep scratch, then you will want to be extra sure that it is full of glue before proceeding.
Step 3: Drying
Now that you have got a good spread of wood glue all over the surface of the record, stop the turntable from spinning and leave the glue to dry for around 24 hours. You can leave the record where it is, so long as it is out of direct sunlight – this can easily lead to a warped record.
Once the 24 hours have elapsed, you can safely test whether the glue has dried properly by touching the outer edge gently with your finger. If it still feels adhesive, then you would be best advised to leave it for another couple of hours. Keep returning and trying again until there is no stickiness left to feel.
Alternatively, you can also leave the record on a piece of newspaper if you are not as comfortable leaving the wet gluey record on your precious turntable. This is typical of record collections, especially the type of record collector bent on precision engineering.
Step 4: Peeling
Here comes likely the most satisfying part of the whole process wherein you peel away all of the dried glue from the record’s surface.
Starting from the outer edge of the record, use your index finger and thumb to grip the glue like a sleeve and pull it gently away from the record’s surface. Lift with a steady and consistent force as you peel away all of the glue, preferably pulling it all away in one piece.
That being said, it’s all good if you don’t get it to come off in one piece – you can easily lift up from another edge and begin the process again. The only thing is if you run out of outer edges to begin peeling from, in which case you will have to begin peeling in the middle of the record, putting the safety of the grooves at risk. Avoid touching the surface of the record at all costs.
Step 5: Playing
Now you can take your record and place it back on the turntable (or leave it there if you never removed it) and give it a test to see how it sounds. You all should know how to do this by now, but if you needed a reminder then it should come in the form of a memo to put your tonearm on the edge of the record and to power it on.
Hopefully, the part of your record that used to skip violently can at least play now or play without the skip. This might not always be the case, though, and wood glue cannot fix scratches that are deeper and more firmly set into the record.
If your record still skips, you can try another coat of wood glue or another cleaning method altogether.
Method 2: Cleaning Away
Of course, your vinyl record might simply need a good clean – yes, while you have been hustling and bustling away with all the wood adhesive in your possession, you could just as easily have cleaned the record and been done with it.
Step 1: Brushing
First, you should begin by removing any surface dirt, dust, and debris with a record brush. Place the record that you want to clean and get it spinning, using a record brush on the surface of the record as it spins to dust away any impurities and build-up of static. A safe bet is to hold the brush down gently for 1-3 spins depending on how deeply marred the surface of the record is with dust.
Ensure that you give the brush a good clean after every use, otherwise, you will convey all of the dirt that you have removed from one record to another.
Step 2: Cleaning
For the process of cleaning the record, you can either buy a professional cleaning kit like the one below, or you can develop your own liquid cleaning solution with the things you already have at home.
Most professional kits will come with a cleaning solution, a brush that caters both to the removal of static and dust and also to the use of the solution, as well as a smaller brush to clean that brush. Follow the specific instructions of the cleaning kit and you can scarcely go wrong.

Alternatively, you can indeed make your own cleaning solution at home with very scant elements. For this, you can combine a quarter of a cup of isopropyl alcohol with three-quarters of a cup of distilled water and a drop or two of dishwasher fluid, placed all in a spray bottle for ease of use.
Place the record onto a microfiber cloth and spray the solution onto its surface, allowing thirty seconds to pass where the record fills the grooves thoroughly, then wipe the liquid away with another clean microfiber cloth. Soak another microfiber cloth in distilled water and wipe away any excess solution from both sides of the record.
Repeat as necessary and try to avoid spraying the center label as paper does not usually take too well to fluids.
Step 3: Toothpicking
For an extra comprehensive cleaning of your record, you can use a toothpick. Rubbing a toothpick back and forth over all the more serious scratches in this way is a great way to target the more stubborn scratches, honing in on the small cracks and lifting up any microscopic debris that might be trapped in there.
Ensure that the pressure you use here is light and gentle – any unnecessarily strong pressure could easily do more damage than good. This is especially important considering that you are working to dislodge any debris buried deep within the cracks. You might just as well dislodge some debris as use this debris to scratch up the record even more.
Again, this might not remove the scratch entirely, but it will hopefully remove any of the surface debris that otherwise prevents the stylus from doing its proper job.
Method 3: Protection
Alternatively, you could just take good care of your records in the first place and you won’t need to worry about any of this stuff at all. Storing your records properly in the right environment is a great place to start.
Step 1: Inner-Sleeving
A great place to start storing records properly is to ensure that you at least return each record to its respective inner sleeve once you are finished using it. These inner sleeves will almost always be made from paper or plastic, though each material is perfectly suited to protecting the record while it is not being used.
If your record has lost its inner sleeve, you can easily buy replacements (like those below).

Step 2: Outer-Sleeving
Of course, the inner sleeve should only really be considered the first line of defense between the many external influences that can affect the sanctity of a record and safety.
Records will almost always come with an external sleeve made from cardboard or some such equivalent. If you have misplaced your own, then you can also purchase plastic replacements (see below) or those made by Original Master Recordings.
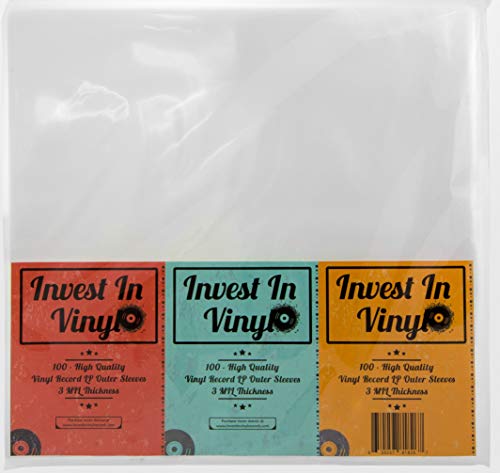
The extra sleeves above can also be used in conjunction with the outer sleeve for added protection.
Step 3: Storing
Having a place to keep your records is one of the essential parts of having a record collection – not only can you keep your records safe and secure, but you can also show them off to those who come to visit your shrine to audiophilia.
Many opt to simply use, say, a bookshelf like Billy (see below) as an Ikea storage solution, though there are plenty of alternatives, either from Ikea or otherwise. No matter how you choose to do it, keeping your records safe in one place is an essential step to maintaining a record collection over a longer period of time.
Step 4: Touching
If we are going to delve into how to properly store your records (as well as why it is important), then it is worth mentioning how to touch and handle your record properly and why that is also just as important.
The common advice is generally to avoid touching any part of the record besides the outer edges and inner label – i.e. to avoid touching the grooves at all costs. Not only will this protect your record from any cosmetic wear like fingerprints, but it will also ensure that as few scratches as possible rear their heads onto the face of the disc.
These grooves are incredibly small and delicate and so should be treated with the utmost caution, preferably not touched at all unless by the stylus.
Step 5: Closing
As we close this series of informational steps on how to properly keep your records safe when not in use, we come to another important facet of audiophilia to do with the closing of the turntable’s lid. This is important even if you are not the kind of record collector who keeps their records on the turntable when they are not in use.
Indeed, leaving the turntable lid open in any instance is to invite all manner of airborne dust into the turntable and onto the turntable platter, two parts of a turntable that definitely do not want to be met with dust.
When you are finished listening to a record (or even when you are listening) ensure that you close the lid as soon as you think to, so as to ensure that no more dust meets the surface of the record than is absolutely necessary.
Keeping the turntable free of dust in this way will also ensure that your records are as free of dust as possible, meaning that it lowers the risk of damage over time as well as the need to dust your records every single time you listen.
Final Tones
So, there you have it! Hopefully, you are now feeling ready and able to rectify any scratches your records might be bearing.
FAQs Scratched Vinyl
Can you fix a scratched vinyl?
Perhaps fix is too strong a word, but you can certainly to some extent remedy a scratched vinyl record to the point that it is either unnoticeable or much improved. To fix a scratched vinyl record in this way isn’t necessarily to fix it as much as it is to help the needle to forget that there was ever a gap there in the first place. Using, for example, wood glue to fill in these gaps and remove any debris that might otherwise be clotting them is a tried and tested way of doing so.
Does it matter if vinyl is scratched?
This will depend on the size, depth, and severity of the scratch. Some scratches – denoted as ‘hairline scratches’ in the biz – are mostly aesthetic blemishes to the surface of a record and are more or less undetectable by the naked ear.
How do vinyls get scratched?
Vinyl records can get scratched in any number of ways, though many of them are due at least in part to the improper storage and care of a record – i.e. by not placing the record back in its inner and/or outer sleeve immediately after it has been played and removed from the turntable.
What happens if a needle scratches a vinyl?
Not all that much, provided that it wasn’t too serious a skip. If the needle went all the way across the record, you can bet that not only did the record take a beating, but the needle might also be a little worse for wear. Repeated instances like this will leave your setup in a sorry state.